Showing posts with label Hair Tutorials. Show all posts
Showing posts with label Hair Tutorials. Show all posts
Thursday, December 1, 2011
Farrah Fawcett Inspired Hair Tutorial
Farrah Fawcett Hair Tutorial Using Clip in Weaves on Pressed Hair
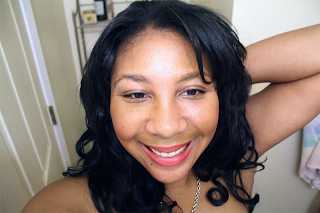
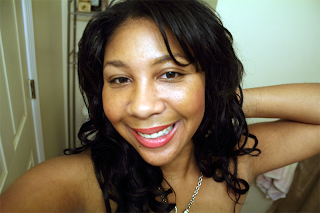
Farrah Fawcett, was well known for her vivacious curls filled with body and her stylish layers. This famous vintage hairdo is still adorn by women decades after its birth. When I first tried out this look it was more of an experimentation, and to my surprise I ended up loving this style on me.
Achieving this look is fairly simple, and I didn't have to resort to using heat on my hair or my weave to do it. It involves a little preparation but its a pretty easy style to do.
Supplies You Will Need:
Instructions:
1. If you are wearing a clip in weave or extensions make sure they are fresh so they can be full of bounce. If your weave is still in pretty good shape you can simply run cool water through them to make sure they are free of residue, and set your hair using rollers.
2. Rolling your hair will only take about 5 to 10 minutes max. You want your hair in larger sections and medium to large size rollers for fullness. Apply a good leave in conditioner or setting lotion only to your ends to avoid kinking up your roots. I used Jane Carter Solution Revitalizing Leave in Conditioner, and I must say that I am pleased with the fabulous bounce my hair has.
3. Protect your hair with a silk or satin bonnet and get that much needed beauty sleep. In the morning start applying tracks working from your back section and then working your way on up. Once you have blended everything in, your style is complete.
 |
| Farrah Fawcett Inspired Layered Hairstyle |
Farrah Fawcett, was well known for her vivacious curls filled with body and her stylish layers. This famous vintage hairdo is still adorn by women decades after its birth. When I first tried out this look it was more of an experimentation, and to my surprise I ended up loving this style on me.
Achieving this look is fairly simple, and I didn't have to resort to using heat on my hair or my weave to do it. It involves a little preparation but its a pretty easy style to do.

Supplies You Will Need:
- Medium to Large Sized Plastic Rollers
- Leave in Conditioner Spray or Setting lotion
- Satin or Silk bonnet

Instructions:
1. If you are wearing a clip in weave or extensions make sure they are fresh so they can be full of bounce. If your weave is still in pretty good shape you can simply run cool water through them to make sure they are free of residue, and set your hair using rollers.
 |
| Roller Set Your Hair in Large Sections |
 |
| Roller Set Clip on Extensions |
3. Protect your hair with a silk or satin bonnet and get that much needed beauty sleep. In the morning start applying tracks working from your back section and then working your way on up. Once you have blended everything in, your style is complete.
Monday, November 28, 2011
Beat the Grease, Wash Your Weave
Grease can easily take away the appeal from your weaves and steal its flow. When your hair starts looking weighed down and greased out it is time for a wash. To maintain your product you want to make sure you are handling them with care and washing them correctly.

When you wash your weaves you want to use cool water. To wash them simply run the cool water through your weaves, gently apply the shampoo, rinse them with cool water, and after you are finished removing the build up let them hang dry. If you are dealing with synthetic hair do not comb the weave while it is wet or run your fingers through the weave. For curly synthetic wigs or weaves, let the curls snap back into place as they dry. |
| Wig Shampoo |
You can use any gentle shampoo formula on your weaves to remove the grime, but I prefer using shampoo that is especially formulated for wigs and weaves. This way you do not have to worry about the weave getting dried out and looking all types of crazy. I purchased wig shampoo for only $3.99 to care for my wigs and weaves; the brand that I bought is good for both human and synthetic hair.
Once you have washed your weave, its bounce will be restored, and it will no longer have that dull flat effect. Please ladies, take care of your weaves, but do not forget to provide your hair with the natural hair care that it needs. While wearing my weaves serves as a style treat for me and it gives my hair a form of protective styling, I try my best not to forget about what's important; the hair underneath my hair piece.
Sunday, November 27, 2011
Make Your Own Clip in Hair Weaves
When you make your own clip in hair weaves, you have the advantage of choosing the hair that you would like to use. At your local beauty supply there might not be clip in hair weaves that are available in the textures that you want, there may be a limited amount of lengths, or the store may lack a variety of hair colors that you can choose from.
Making your own extensions solves this problem. You pick the hair you want to use without being limited to already made clip ins that are available. Here is a basic guide for how you can make your own clip in hair weaves.
Supplies You Will Need:
2. For hair tracks that have a longer width you will have to place a hair extension clip on the tail end of the left side, the right side, and one in the center of the track. Start by sewing on the hair extension clip onto either the right or left side. Then move onto another side and finish by sewing a clip onto the center. Medium sized cuts will require two clips and small cuts will only need one.
Making your own extensions solves this problem. You pick the hair you want to use without being limited to already made clip ins that are available. Here is a basic guide for how you can make your own clip in hair weaves.
Supplies You Will Need:
- Pack of hair weave (hair tracks)
- Black Thread
- Needle
- Scissors
- Hair Extensions Clips
 |
| Needle and Thread |
 |
| Scissors |
 |
| Hair Extensions Clips |
Instructions:

3. Sew by going through the hole on the clip onto the track (do not go through the other side of the track, just the side you are working on) and then back through the hole on the clip and continue until the clip is securely in place. All clips are different some of them have three holes that you can sew through while others may have only two.
That's all you need to do to make your own clip in hair weaves, it's just that simple! : )
I have already made my purchase for Curl Duchess clip on hair extensions that have a more natural flavor to them. I can't wait to receive them as soon as I do I will be sharing this review with you all, as well as tips for their installation.
Subscribe to:
Posts (Atom)

Connect


